Shopping Cart Script using Session Array This shopping cart script uses two dimensional session array to store product id and quantity as selected by customer. We used PHP script to manage backend and MySQL database to store the products. JQuery is used at front end and Bootstrap 4 is used for style effects of this script.
Selected products with quantity are stored in a two dimensional session array.
This shopping cart script uses two dimensional session array to store product id and quantity as selected by customer. We used PHP script to manage backend and MySQL database to store the products. JQuery is used at front end and Bootstrap 4 is used for style effects of this script.
Selected products with quantity are stored in a two dimensional session array.
Learn the Basics of Two dimensional array shopping cart scripts This script uses three main parts .
Displaying products with options to add , remove and update the Cart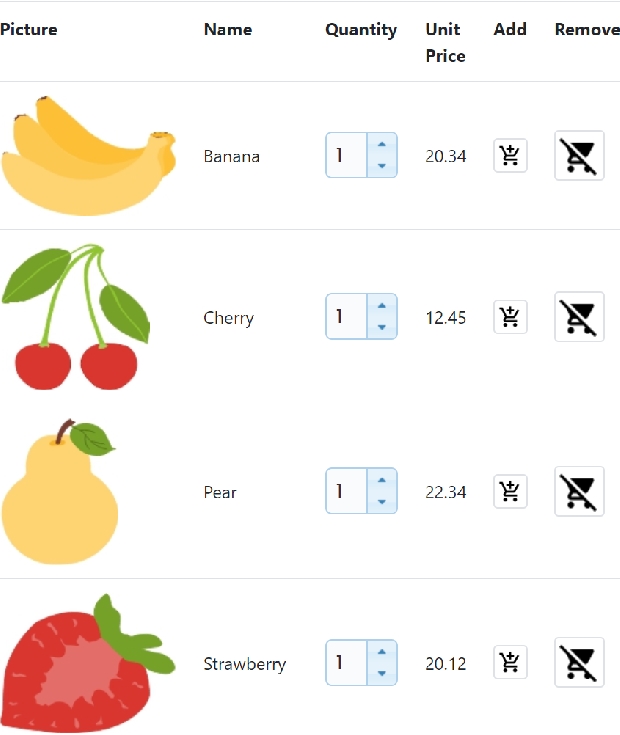 We will display the products by taking data from a MySQL table. In our table, against each product we have stored the path of the image of the product, product Id ( p_id) ,product name, unit price. How to display images by taking data from MySQL table. Displaying Product with Quantity matching to CartWhile displaying the products , we will display JQuery UI spinner to show the quantity of the product available in the cart. If the product is not there in shopping cart then the spinner ( quantity ) will show 1 and user can change to any value within a maximum limit of 10. We have done this by using PHP code at the loading of the products page. We read the quantity available against each product and then set the value of the spinner.Adding products to Cart by buttonDefault quantity of each product is kept at 1, to add this quantity user can click the add button against the record to store the product id and quantity in our cart. We used common class for all add buttons ( class='img-thumbnail cart-add' ). We used my_function() to send product id and quanity to backend script.Adding products by changing Quantity ( Spinner )Inside Shopping cart, quantity for the product will be incremented or decremented with the change of value of the spinner ( quantity ). There is a button for users to add products with default quantity to the shopping cart, however with change in quantity by Spinner , the cart gets automatically updated.Removing products from CartWhile displaying the products with details , there is an option to change the quantity, customer can remove the product by changing the quantity to zero.User can click the remove button against each product to remove the item from the cart. We used class='cart-remove' for all remove buttons of the products. As discussed above there are three events which affects the Cart and against each of these events we Post product id and quantity to our backend script add.php . These three events pass product id and quantity through POST method. 1.Addition of product ( product id and quantity equal to 1 ) through button 2.Change in Quantity ( product id and quantity ) through spinner 3.Remove Product (product id and quantity equal to zero ) through button In all the above three cases we will post Product Id ( p_id ) and Quantity ( qty ) to backend script add.php . For this we will prepare a common JQuery function which we can call on triggering of different events. This function post data and receive the status of the backend posting and show the message to user. Displaying Number of products in CartAt the top right of the page we will display number of items present in the cart. This is same as counting number of elements present inside an array.size_of_cart is returned by our backend script add.php file with a value equal to number of elements present inside our $_SESSION[cart] array.
Subscribe to our YouTube Channel here
This article is written by plus2net.com team.
https://www.plus2net.com

| ||||||||||||
| ||||||||||||